Apparel Sample Development Process: From Reference Image to Approved Sample
Apparel sample development usually moves through a defined sequence: product requirements are reviewed, fabric and construction details are confirmed, a first sample is made, fit and workmanship are evaluated, revisions are recorded, and an approved sample is established before bulk production. The exact number of sample rounds depends on how complete the original specifications are and how much the product changes during development.
For apparel brands, sampling is where a design begins to become a real product. A sketch, reference image or Tech Pack may communicate the intended direction, but the first physical sample reveals how the fabric, measurements, construction and proportions actually work together.
A good sampling process is not simply about producing a garment that looks close to the original idea. It creates a controlled development path where the buyer and manufacturer can identify problems, record changes and gradually establish a reliable reference for bulk production.
What Is Apparel Sample Development?
Apparel sample development is the process of turning product information into a physical garment that can be reviewed, measured, worn or evaluated before bulk production begins.
Depending on the project, development may begin from a detailed Tech Pack, a physical reference garment, product photographs, sketches, a measurement chart or a combination of these materials.
During sampling, the brand and manufacturer gradually confirm important product details such as fit, measurements, fabric, trims, construction, branding and finishing.
The exact workflow varies by product and manufacturer, but the objective is consistent: reduce uncertainty before bulk production.
What Should You Prepare Before the First Sample?
The more clearly a product is defined before sampling, the easier it becomes for the manufacturer to understand what needs to be developed.
Useful development inputs may include:
- A clothing Tech Pack
- A physical reference garment
- Front, back and detail reference images
- Garment measurements or a size chart
- Fabric direction or physical swatches
- Logo and artwork files
- Color references
- Label and trim requirements
- Target order quantity
- Target development or launch timeline
A project does not always need every detail finalized before the first conversation with a manufacturer. However, both sides should identify which specifications are already confirmed and which still require development.
Buyer takeaway: The first sample should begin from a clear development brief, not from a collection of disconnected screenshots and verbal comments.
Can a Manufacturer Develop a Sample From a Reference Image?
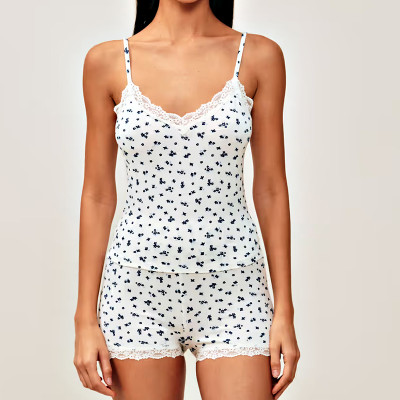
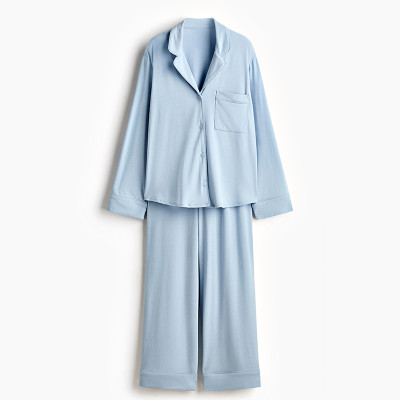
A reference image can be a useful starting point because it communicates silhouette, styling and general product direction. However, an image rarely contains enough technical information for accurate sample development on its own.
A manufacturer may still need clarification on:
- Garment measurements
- Fit preference
- Fabric composition
- Fabric weight or GSM
- Construction details
- Logo size and placement
- Labels and trims
- Color requirements
- Finishing details
A photo can therefore communicate the idea, but development specifications still need to be established before the sample becomes a reliable production reference.
Step 1: Review the Product Brief and Development Inputs
A reliable apparel sampling process normally begins with a technical review rather than immediately cutting fabric.
The manufacturer first needs to understand what the buyer wants to develop and whether enough information is available to begin.
The review may cover questions such as:
- Is the product design clear?
- Are the key measurements available?
- Is the fabric specified or still open for development?
- Are special trims required?
- Does the construction need clarification?
- Is branding information complete?
- Which details could affect the initial quotation?
- Which points must be confirmed before sampling begins?
If key information is missing, resolving those questions before the first sample can save unnecessary revision work later.
Step 2: Confirm Fabric, Trims and Construction
Fabric is not simply a material choice. It directly affects the way a garment hangs, stretches, recovers, feels and fits.
A pattern developed in one fabric may behave differently when the final bulk fabric changes significantly. This is why fabric direction should be confirmed as early as practical.
Fabric
Where relevant, the development team may review:
- Fiber composition
- GSM
- Knit or woven structure
- Stretch and recovery
- Surface finish
- Inside finish
- Hand feel
- Color
Trims
Zippers, drawcords, elastic, buttons, snaps, labels and other components should be reviewed when they influence fit, appearance, function or quotation.
Construction
Seam placement, stitching, panel construction, hems, pockets, rib attachment and finishing details should be clarified where the design cannot be understood from the reference materials alone.
Step 3: Develop the First Sample
Once the development inputs are sufficiently clear, the manufacturer can begin creating the first sample.
Depending on the project, this may involve pattern development, material preparation, cutting, sewing, branding application, finishing and an internal review before the sample is sent to the buyer.
The first sample does not necessarily represent the final production-ready garment. Its purpose is to turn the specifications into something physical that can be evaluated and improved.
What Is the First Sample Actually Checking?
The first sample may be reviewed from several different angles depending on the purpose of the project.
| Review Area | What Buyers Should Check |
|---|---|
| Overall Fit | Silhouette, proportion, balance and how the garment sits on the body |
| Measurements | Key Points of Measure compared with the current specification |
| Fabric | Weight, hand feel, stretch, drape and suitability for the intended product |
| Construction | Seams, stitching, panel construction, hems and assembly details |
| Branding | Logo dimensions, position, method and overall appearance |
| Trims | Correct component type, appearance, position and function |
| Appearance | Whether the physical sample matches the intended design direction |
Step 4: Review Fit, Construction and Material Feedback
Once the buyer receives the first sample, the next stage is not simply to decide whether it looks good or bad. Useful feedback should identify exactly what needs to remain, what needs to change and how the change should be measured or interpreted.
Fit Feedback
Comments such as “make it slightly looser” can be difficult to execute consistently. When possible, fit feedback should be connected to measurements, proportions or clearly marked photographs.
Construction Feedback
If a seam, pocket, waistband, cuff or other construction detail is incorrect, the revision should identify exactly what needs to change.
Fabric Feedback
The buyer should confirm whether the sample fabric is acceptable or whether a different weight, finish, stretch level, color or hand feel is required.
Artwork and Branding Feedback
Logo placement, dimensions, stitch density, print appearance or other branding details should be reviewed against the current artwork specification.
Practical rule: Good sample feedback should be specific, measurable where possible and connected to the latest product specification.
How Should Sample Comments Be Recorded?
Sample development becomes harder to control when revisions are spread across emails, messaging apps, separate spreadsheets and verbal discussions.
A practical revision record may include:
- Sample version
- Review date
- Measurement changes
- Fit comments
- Construction changes
- Fabric comments
- Artwork changes
- Reference photographs
- Approval or revision status
The Tech Pack or related development specification should also be updated when measurements, construction or artwork change.
Step 5: Revise the Sample
Sample revisions are a normal part of apparel product development. A first sample may reveal fit, fabric, construction or branding details that were difficult to evaluate from drawings alone.
The purpose of each revision should be clear. If possible, avoid changing several major variables without documenting them, because it becomes harder to understand which change caused the final result.
For example, changing fabric weight, garment measurements and construction at the same time may produce a very different sample, but it may also make the development process harder to evaluate.
How Many Sample Rounds Are Normal?
There is no fixed number of sample rounds that applies to every apparel product.
A mature design with a complete Tech Pack, familiar fabric and established fit may require less development work. A new product that begins from reference images, an unfamiliar fabric or an entirely new silhouette may require more revisions.
The number of rounds can be influenced by:
- Product complexity
- Quality of the original specifications
- Fit requirements
- Fabric availability
- Custom trim development
- Artwork complexity
- How much the design changes after each review
The more useful question is not “How many rounds should sampling take?” but “Is each sample round resolving clearly defined development issues?”
Step 6: Approve the Sample
Sample approval should be tied to a specific garment version and a specific set of specifications.
Before approving the sample, buyers should review whether the following points have been confirmed:
- Overall fit
- Key measurements
- Fabric
- Construction
- Color
- Logo and artwork
- Trims
- Labels
- Finishing
- Packaging requirements where relevant
Approval should not rely on memory or informal comments. Both sides should be able to identify exactly which sample and which specification version are approved.
Fit Sample vs Pre-Production Sample: Are They the Same?
Not necessarily. Apparel manufacturers and brands may use sample terminology differently, so the purpose of each sample should always be confirmed rather than assumed from its name.
Fit Sample
A fit sample is generally used to evaluate measurements, proportion, silhouette and how the garment fits the intended body or fit standard.
Pre-Production Sample
A pre-production sample is typically closer to the specifications intended for bulk production and may be reviewed after key materials, construction, artwork and other product details have been confirmed.
Because terminology varies, buyers should confirm what each sample represents in the manufacturer's development process.
Step 7: Hand the Approved Sample Into Bulk Production
Sample approval does not mean that bulk production should rely on the physical garment alone.
A more reliable handoff combines the approved sample with the current technical specifications and confirmed materials.
Depending on the project, the bulk-production reference may include:
- Approved physical sample
- Latest Tech Pack
- Approved measurement specification
- Approved fabric
- Approved trims
- Approved artwork
- Confirmed labels
- Color requirements
- Packaging instructions
- Relevant quality requirements
Keeping these references aligned helps reduce the risk of bulk production being made to an outdated sample or specification.
What Must Be Approved Before Bulk Production?
| Approval Item | Confirmed |
|---|---|
| Latest sample version | □ |
| Measurement specification | □ |
| Fabric | □ |
| Color | □ |
| Construction | □ |
| Logo / artwork | □ |
| Trims | □ |
| Labels | □ |
| Packaging requirements | □ |
| Quality requirements | □ |
Common Apparel Sample Development Problems
How Long Does Apparel Sample Development Take?
Sample development time depends on the product and how much work is required before the sample can be made.
Timing can be affected by:
- Fabric availability
- Custom trim sourcing
- Pattern development
- Garment complexity
- Printing or embroidery
- Incomplete specifications
- Revision requirements
At MinCharm, sample development typically takes around 7–10 days once the required product information and development conditions are sufficiently confirmed. Actual timing can vary according to fabric availability, garment complexity, customization and the amount of development work required.
Buyer Sample Approval Checklist
Before approving a garment sample for the next development or production stage, review the following points.
Final Takeaway
Apparel sample development is not simply the stage where a factory makes one garment before production. It is the stage where design intent, technical specifications and physical construction are tested against each other.
A more reliable process begins with clear product information, confirms fabric and construction before unnecessary work begins, records specific feedback and keeps every revision connected to the latest specification.
The objective is not to minimize the number of sample rounds at any cost. It is to reach an approved product reference where fit, measurements, materials, construction and branding are sufficiently clear for the next stage of manufacturing.
Frequently Asked Questions
How does apparel sample development work?
Apparel sample development normally begins with a review of the product brief, measurements, fabric and construction requirements. A first sample is then developed and evaluated for fit, measurements, materials and workmanship. Buyer feedback is recorded, revisions are made as needed and a specific sample version is eventually approved as a reference for the next production stage.
Can a clothing manufacturer develop a sample from a photo?
A photo can be used to communicate product direction, but it usually does not provide enough information for accurate sampling by itself. Measurements, fabric, fit, construction, branding and other specifications still need to be clarified during development.
How many sample rounds are normal?
There is no fixed number of sample rounds for every garment. The number depends on product complexity, design readiness, fabric availability, fit requirements and how much changes after each review. A better goal is to make sure each round resolves clearly identified development issues.
What should I check before approving a clothing sample?
Review the garment fit, key measurements, fabric, construction, color, branding, trims, labels and any remaining revision comments. The approved sample should also match the latest technical specification intended for the next stage.
Is a fit sample the same as a pre-production sample?
Not necessarily. A fit sample generally focuses on measurements, proportion and fit, while a pre-production sample is typically closer to the specifications intended for bulk production. Terminology and workflow can vary by manufacturer, so buyers should confirm the purpose of each sample rather than relying only on its name.